Saturday, February 5, 2011

Headstock

I thought replacing the tuners would be pretty straightforward. I just wanted Kluson-type keystone knob tuners similar to the Ventura's original tuners but of a higher quality. Several manufacturers make reproductions of Klusons (including the new company using the Kluson name) but the ones from Gotoh appealed to me the most since they had the look, had good quality and price, and used vintage-style press-in bushings. Unfortunately, looking at the specs online, I found that the capstan height was going to be too short for the Ventura headstock. After a bit of research, the only brand that seemed to fit this particular criteria was Grover so that's what I ended up getting. They're an excellent brand but I've never really liked the look of their washers with screw-in bushings - oh well, not much choice for me here. From my research, I knew the tuner holes were going to need to be enlarged to fit the Grovers and I found this neat little tool (at stewmac.com):
It's a rear peghole reamer that creates a counterbored peghole to more precisely fit tuners with threaded bushings like the Grovers. Anyway, it worked like a charm.

After reaming the pegholes, I did some sanding of the headstock (front and back) to smooth over the areas I had filled and/or touched up previously. Here it is after dry sanding with 400-grit sandpaper.

I then switched to wet-sanding, moving to 600, 800, 1000, and finally 1500-grit sandpaper. After that, I used my foam rotary pad with medium polishing compound followed by swirl remover (using a different pad of course). It looked like glass when I was done:

Coming up: Finishing the frets.

Thursday, January 27, 2011

Re-fretting

Finally time to install the new frets. I bought a fret press caul with several different radius inserts to use with my drill press. Just seemed like the easier approach versus using a fretting hammer. Before starting I cleaned both sets of frets with Naphtha solvent. Ready to start:

Because of the neck binding and curvature of the fingerboard, it was a little tricky to measure the correct length for each fret. Plus the pre-bent frets were slightly over bent (which helps prevent the ends from popping up once installed). I used a small flexible metal ruler with a sliding pocket clip to measure each fret slot. Then I cut the fret to a slightly longer length and nipped the tang at each end so that the tang angled inward. This would allow the fret to expand outward slightly as it was pressed/flattened and avoid damage to the neck binding. You can kind of see what I mean here if you look closely at the fret ends:

The first two frets installed:

I was very happy I had bought that extra set of frets. A couple of times I cut a fret just slightly too short so had I not had the extra set, I would not have had enough frets to finish the job in one go. Here is a shot with a few more frets installed:

I used my fret rocker tool to check how level the frets were as I went along. When I found a high fret, I'd re-press it or use my fretting hammer to seat it better. Supporting the neck under the fret being pressed in was simple until I got to the point where the frets were over the tenon - this required a little bit more creative approach to supporting the neck but it wasn't too difficult. All the new frets installed:

Next step was to glue the frets in so I needed to prep the fingerboard. Using a Q-tip, I applied wax paste very close to but not touching each side of each fret. This would keep the thin super glue from sticking to the neck as I applied it.

I used a whip tip nozzle extension to apply the glue along each side of the fret. The thin super glue was then drawn into the fret slot. I then wiped off any excess glue with a piece of paper towel. Gluing completed:

It took several hours (including prep) to get the frets installed and glued. By this point, it was late enough on a Sunday night that I knew I wouldn't have enough time to level, crown, and dress the frets so it'll wait until next time.

Saturday, January 22, 2011

Interlude - pickups

Since I decided to switch all the hardware over to chrome, I had wondered what to do about the pickups. Leave them gold? Maybe buy new ones? I really like '57 Classics and they're not cheap so I looked at just replacing the covers and pole pieces. I ended up buying genuine Gibson chrome neck pickup covers for about $12 each ('57 Classics are the same for both neck and bridge positions). The pole pieces took a little more effort. I found one online source that had genuine Gibson pole pieces but they were $2 for EACH screw!!?? After more searching I found some inexpensive pole pieces on eBay that were made of 1022 alloy which supposedly will improve the tone of the pickups. I figured for such a low price it was worth a try. Here are all the new parts including pickup rings and all screws necessary to mount the pickups.

Here they are after replacing just the pole pieces (new covers in the foreground). The pole pieces fit perfectly and looked correct too. I bought 2 sets (6 each set) but they actually included a few extras too which I thought was a nice gesture. Since these are slotted screws, it's very easy to slip with the screwdriver and scratch up the covers so it seemed prudent to change them before putting the new covers on.

Setting up my 'work space'. Soldering iron, solder, pliers, cork sheet as a work surface so the covers don't get scratched up.

To remove the old covers, I used a utility knife to carefully cut through the two solder beads on each side of the cover.

Cover removed:

Before putting the cover on, I used a small flat file to file the inside lip where the solder would attach it to the pickup. Otherwise the solder won't stick to the chrome. One down, one to go:

Both done. Just like new!

Body work

Since I was filling the old screw holes on the neck, I thought it would be a good time to do the same on the body. The original pickups were wider than standard humbuckers so when they were replaced by the '57 Classics, the pickup rings were replaced too. Unfortunately, they weren't quite centered under the strings and part of the pickup route opening could be seen on the treble side of the neck pickup ring. So before I can reposition them, I'll need to fill the old holes. I used an X-acto knife to whittle the toothpicks to down to the right size to fit the holes and super glue to glue them.

Next came the bridge stud holes. They needed to be filled too but toothpicks weren't going to cut it. I measured the diameters and it was just under 1/2". I could get a 1/2" diameter dowel but do I drill out the holes to fit it or try to sand the dowel down to size? Went to the hardware store and found just what I needed: 1/2" dowel pins. These were already cut to short 1-3/8" lengths and had fluted shanks. They'd be much easier to sand down to the right size and the fluting would provide some space for the glue. Below you can see one I've already sanded and the other about to be sanded (and also that I've started to snip off the ends of the toothpicks filling the pickup ring holes).

Once I had both plugs fitting snugly, I put some Titebond wood glue on them and pressed them into place.

Plugged the holes for the back plate screws too. Two of the holes were already close to being stripped anyway.

The tailpiece and pickguard screw holes were filled next.

The new US switch and pots require larger openings than what the original Japanese parts needed (the hole for the output jack was already enlarged to accomodate the replacement Switchcraft jack). I used a wood reamer to enlarge the holes for the pots and a short chunk of dowel with sand paper wrapped around it for the switch hole. Here you can see the switch nut. I used it to test the fit as I sanded.

Once the toothpicks in the back of the headstock had dried and been snipped off, I used a riffler file to file the stubs flush with the surrounding wood. Using a lacquer touch up marker in Cherry Red, I touched up the ends of the toothpick plugs. I'll let it dry before doing drop fills of clear lacquer.

I touched up all the ends of the plugs on the body too. The plugs for the studs took the stain a little unevenly but most of that will get drilled out for the new bridge studs anyways.

Next time: Back to the neck.

Tuesday, January 18, 2011

Inlays - 2nd pass

Well, I decided I'd try to get that crooked inlay out to redo it. I bought a heat gun for softening the epoxy but after thinking about it (750 to 1000 degrees!) I was concerned I might melt the binding on the neck. So I gave the hair dryer method a shot. Also tried scraping away the epoxy from around the inlay but I was just making a mess of things. Finally gave up before I caused irreparable damage. I considered a 'terminal extraction' but really how bad was it? Plus I probably would not be able to match the exact tint and look with a new inlay. And besides, there are worse flaws than that on the guitar (see earlier post with close-up of the neck joint).

I did put another batch of epoxy around the edges of the inlays to smooth out all the rough spots (and fix my botched attempt to extract the first inlay). I also included the last two upper inlays this time for good measure.

I let it dry for only about 8 hours before scraping off the excess epoxy - so much easier this time. I sanded the fingerboard using a radius block with 240-grit self-adhesive sand paper and then wiped it down with a damp cloth. I then went through several grits of sand paper on the each inlay. I stopped at 800-grit. This gave the inlays a nice matte finish which I though looked much more elegant than the very plastic-y shine they originally had. Wiped it down again and also scraped the fret slots to remove any debris and dust. Basically it's ready for the frets although I will probably touch up the plugged screw holes first.

Monday, January 17, 2011

Inlays - scraping the epoxy

My scraping tool showed up in the mail amongst other parts and supplies. My brother also came over to pick up his new guitar and start setting it up. So we both commenced our separate projects.

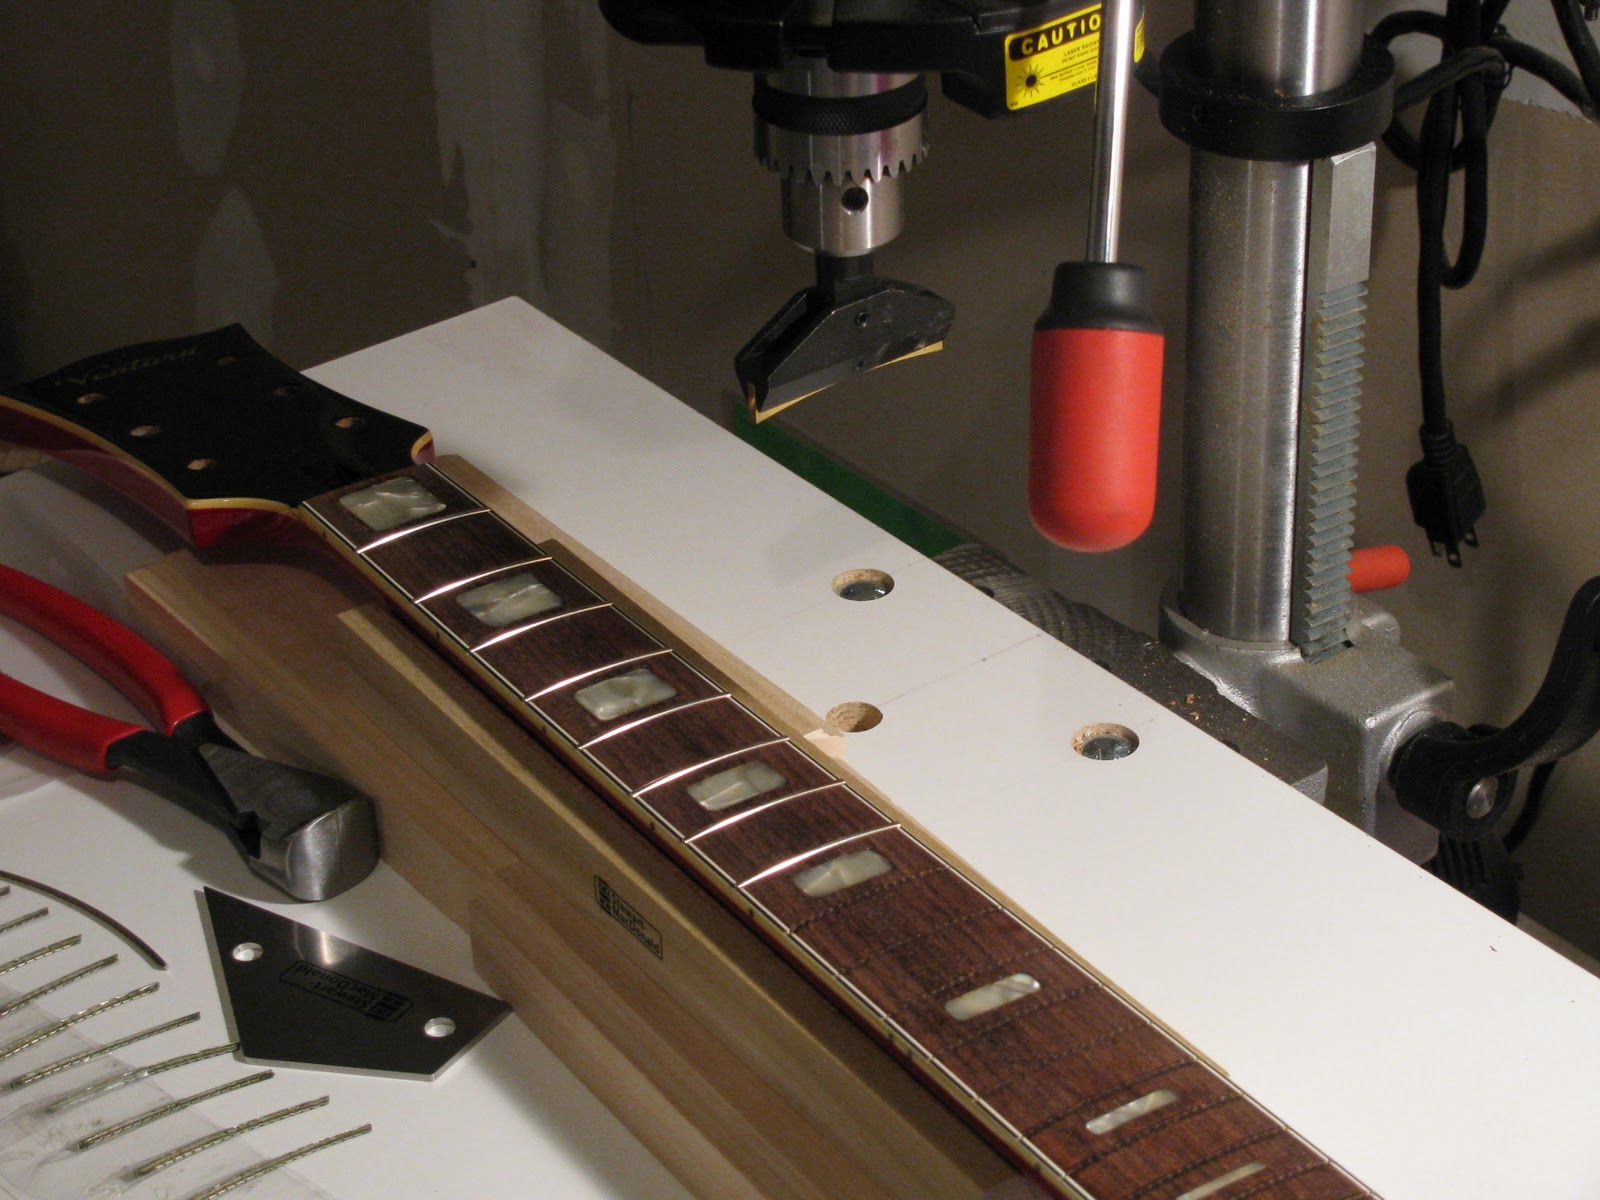
Neck and scraping tool:

The epoxy had really cured well after 6 days (read: solid like a rock). Scraping was a chore. Next time I will do it after the requisite 8-12 hours drying time instead. The epoxy was still tacky and rubbery at that point and would have been much easier to scrape off. The aftermath:

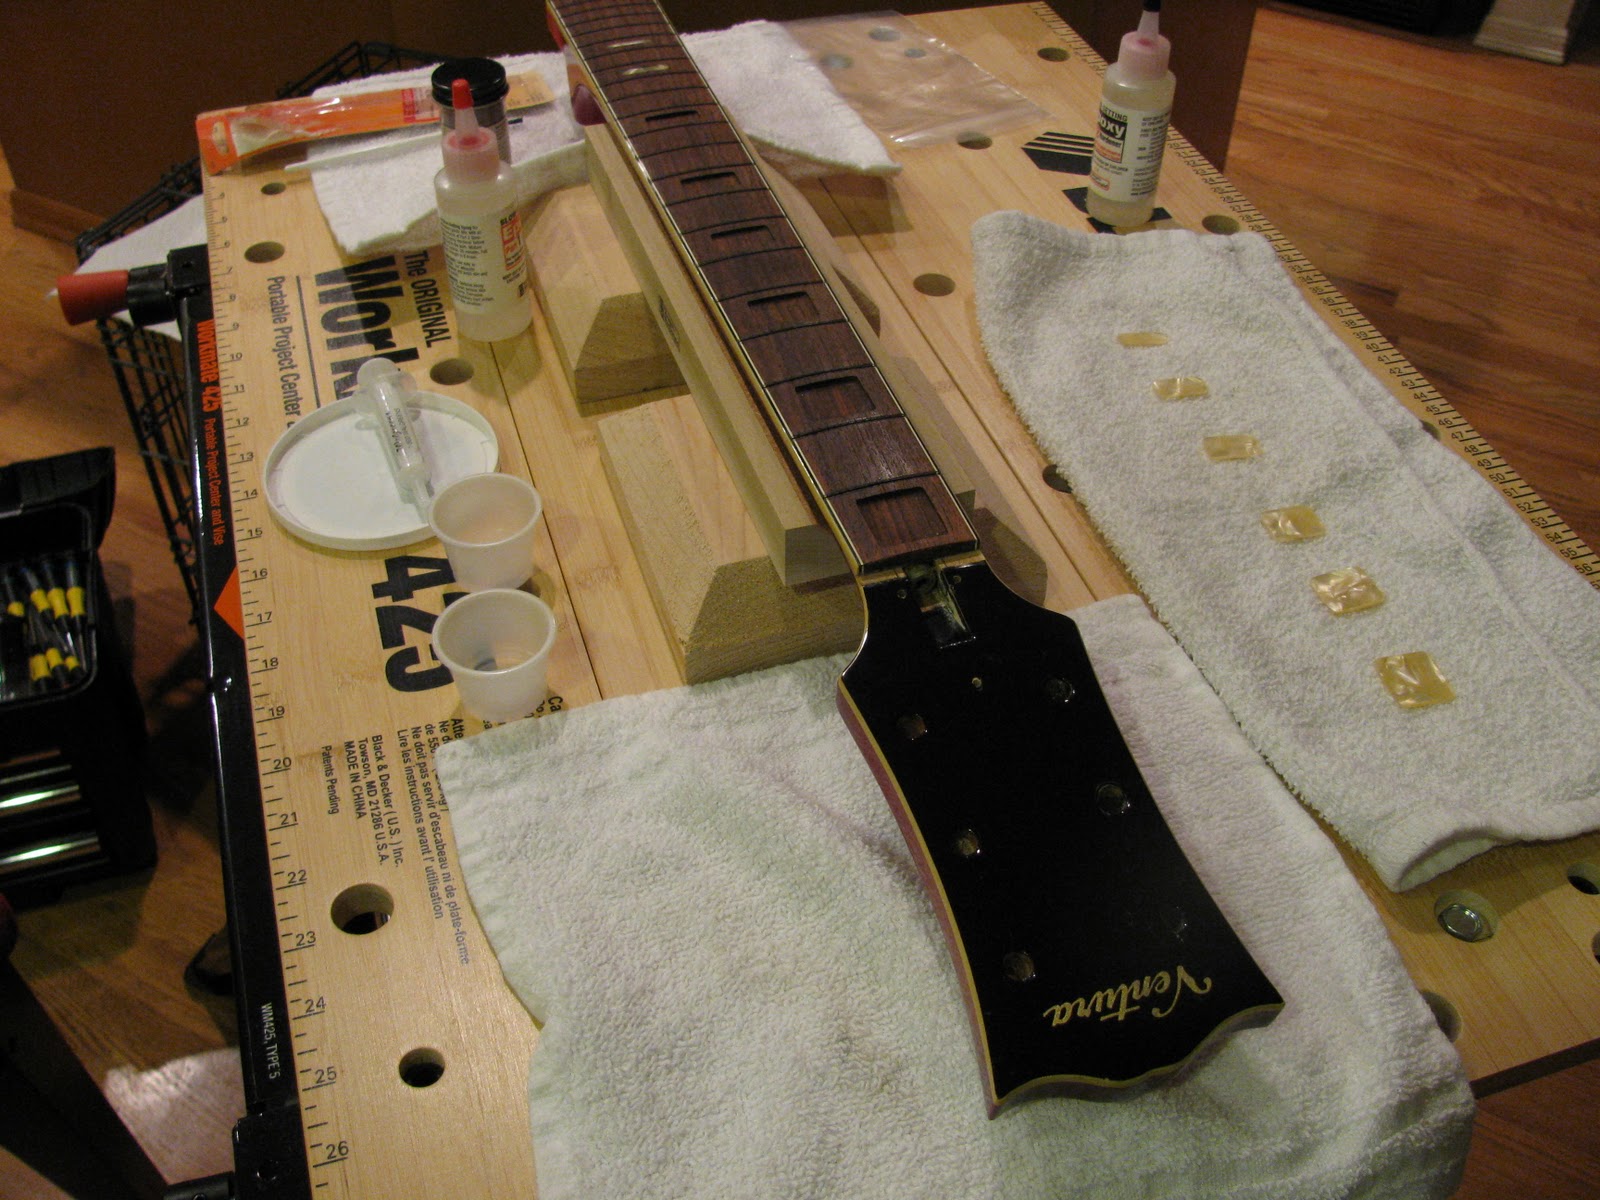
Came out pretty good except there were a few spots where some bubbles had formed so the surface was not smooth around the inlay edges. The first position inlay was also slightly crooked. It was hard to see the exact inlay orientation at the time since the epoxy had seeped over the edges. Argh.

Meanwhile, there was some buzzing on the D string of my brother's Epi Dot. Seemed like the slot in the nut was too low. Since he was going to re-string it anyway, I figured we could check the frets while the strings were off too. Turned that while the neck was super straight, the frets were uneven in multiple spots so a fret level and dress was in order. We strapped the guitar down, he marked the tops of the frets with a Sharpie, and then he started filing:

After several passes with the fret leveling file:

Once that was done, he moved on to crowning the frets. Didn't get any pics because I was too busy scraping away at the epoxy. Once he finished crowning the frets, he switched to a fret dressing stick:

 I had 4 different grits of sand paper for the dressing stick but he only used 3 of them. In retrospect, he thought using the 4th grit would have produced an even smoother result. It was getting late and he was running out of steam. Last step was to go over the frets with 0000 steel wool:

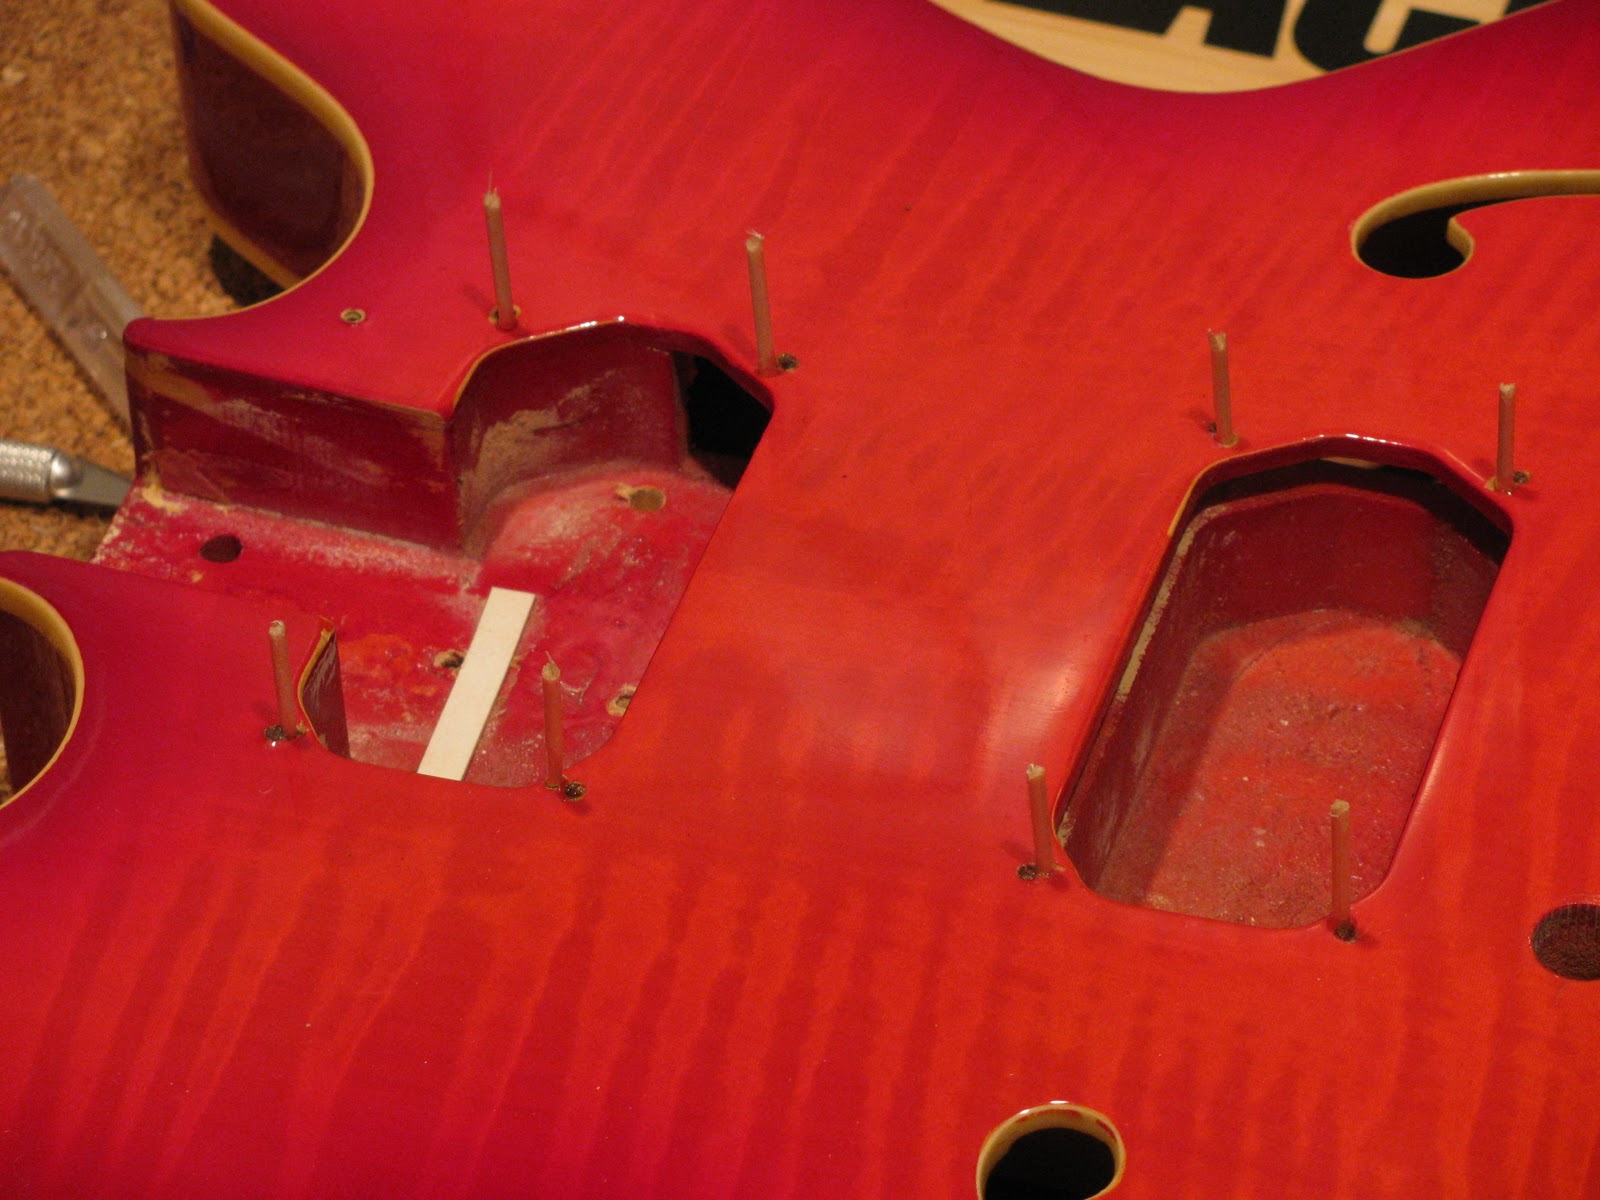
After cleanup and a polish, it was time to re-string. Note the pickguard and clamp in the foreground - the metal Epiphone 'E' logo was peeling off so he glued the loose portion and clamped it while it dried.

After tuning it up we were still getting some buzzing. We built up the nut slot a little with some super glue and bits of toothpick and adjusted the truss rod and bridge height. Much better. Didn't have time to adjust the intonation before he had to leave but added that to the list of other small projects/mods he wanted to do in the near future.

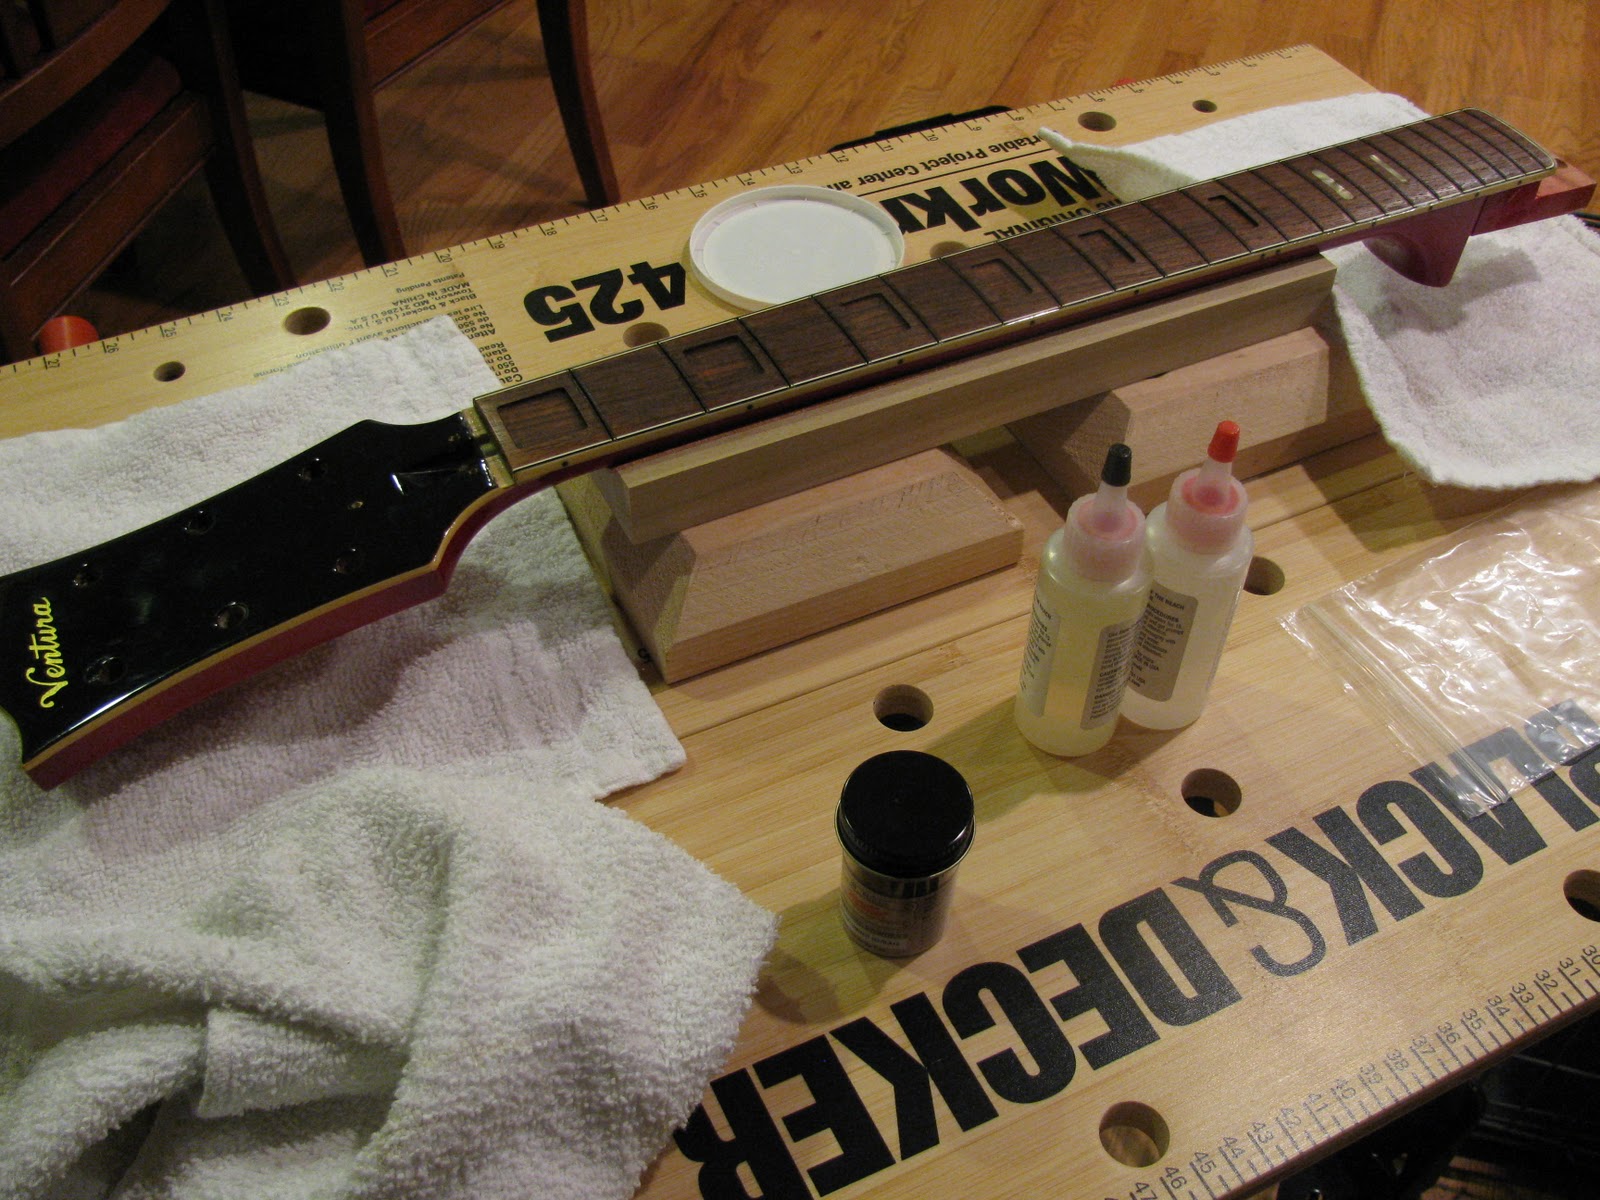
Meantime, I was plugging the old tuner screw holes on the back of the headstock of the Ventura. These will mostly be covered by the new tuners but I thought it'd be good touch-up practice for me on an inconscipuous area.

I also decided to do the same for the truss rod cover screw holes. I'm going to keep the original plate but replace the screws with newer, better quality ones. Of course the threads won't match so...

Next, I think I'll try to fix that crooked first position inlay and maybe back-fill the non-smooth edges with more epoxy...

Friday, January 14, 2011

Re-installing the inlays

Well, I finally got around to putting the inlays back on the neck. Prepping: bottles of epoxy resin and hardener and jar of 'burnt umber' furniture powder for tinting the epoxy.

The epoxy requires mixing equal amounts of resin and hardener for it to set up properly. I needed something disposable and that I could use to accurately measure liquids in. So I ended up using a couple of leftover measuring cups from the kids' medicine cabinet - the type that come with liquid pain reliever or cough syrup. Plus I needed to be able to mix in the coloring powder before applying the epoxy to the neck.

My first batch was way too dark. I didn't realize how little was really needed to color the epoxy. Second batch was a little better and that's what I put in the inlay routes. I remembered reading somewhere to fill each route to about 2/3 full. That would provide enough epoxy to bond the inlays to the fretboard and fill in any gaps in the surrounding wood. I think I put a little more than that in but should be ok - just more to scrape off later.

I had checked each inlay in its slot ahead of time to find the best fit and laid them out in the correct sequence and orientation. Then it was just a matter of dropping them into place and firmly pressing them to get any air bubbles out and get the epoxy to fill the gaps around the edges of each inlay.
The epoxy instructions said to let it cure for 12 hours but it was still a little tacky at that point, so I figured I could let it set for a few more days. Next step will be to scrape the excess off and sand the fretboard smooth. After that, it'll be on to actually fretting the neck.

Wednesday, January 12, 2011

Price of the Ventura

Here's what I traded my brother for the Ventura:
It's a lefty 2007 Epiphone Dot. Pickups are supposed to be made to '57 Classic specs. I'm really impressed with it. Neck is straight as an arrow and the quality is really high all around. Very nice. I'm actually a little jealous. Now I want one :)

Tuesday, January 11, 2011

Bridge studs - removing

Well, I finally broke down and bought a knob/stud pulling tools.
Worked really well. Forgot to score around the edges though so got some flaking around the holes. More touch up. The new studs should help cover most of it up too. Here are shots of the start and end of pulling the first one out. Not bad:
I actually tried to do this manually with some pliers but it was difficult enough that I was afraid I'd really bugger it up. That's when I decided to order the tool. Been wanting one for while anyway just for pulling knobs. I've used the wrap-a-T-shirt-and-twist-it-tight method which works 'ok' but this will be much slicker. Plus the T-shirt won't work on a bridge stud very well.

Friday, January 7, 2011

New Frets

The new frets have arrived. I chose Fender Vintage Fret Wire for a couple of reasons: they are very close in size to the old frets, they are pre-cut into 2-1/2" pieces, and most importantly pre-bent for 7-1/4" radius necks. This will save me a lot of time (and money since fret benders, fret tang nippers, and fret fitters are not cheap). I got these from Angela Instruments Online. Yeah, I bought two sets. They weren't expensive and I've found that it's a good idea to have extras on hand whenever possible. I don't have a lot of spare time so weekends are usually when I get to do this stuff. So if I have to order something, that usually means a delay until the following weekend even if I get the part(s) quickly.

Thursday, January 6, 2011

Removing the inlays

The inlays need some attention. The first 6 have started to lift a little and there are noticeable gaps around the edges. While the surrounding wood has probably shrunk over the years, looking closely reveals a rather sloppy inital job - corners are not consistently rounded and edges seem to be very rough. The old epoxy they used to fill the gaps has stretched too. Heat is the recommended method to remove these but since celluloid is flammable I have to use indirect heat - thus the hairdryer.

The last two I'm going to leave alone. They're still seated nicely and weren't in as bad of shape as the others.

The dark stuff on the edges is not wood. It's the colored epoxy they used to fill the gaps around the inlays when they were installed. The edges of the inlays themselves were not smooth at all which didn't help the final aesthetics either.

Oops, forgot to use the flash. Anyway, here they are cleaned with edges sanded smooth. I rounded all the corners too. I could replace them all with newer material but they actually look really good now and have a nice vintage-looking yellowish tint. People will go to all kinds of lengths to get that relic'd look.

Sanded and cleaned the inlay cavities to get rid of the previous glue residue. Now just need to wait for the FedEx guy to deliver more tools and supplies before I can continue.